Cluster Management
Configuration
High Availability
KubeBlocks integrates the official Redis Sentinel solution to realize high availability and adopts Noop as the switch policy.
Redis Sentinel is the high availability solution for a Redis Replication Cluster, which is recommended by Redis and is also the main-stream solution in the community.
In the Redis Replication Cluster provided by KubeBlocks, Sentinel is deployed as an independent component.
Check whether the switch policy is Noop.
kubectl get cluster redis-cluster -o yaml
>
spec:
  componentSpecs:
  - name: redis
    componentDefRef: redis
    switchPolicy:
      type: Noop
Check whether the following role probe parameters exist to verify the role probe is enabled.
kubectl get cd redis -o yaml
>
probes:
  roleProbe:
    failureThreshold: 2
    periodSeconds: 2
    timeoutSeconds: 1
This section takes the cluster mycluster in the namespace demo as an example.
View the initial status of the Redis cluster.
kubectl get pods -l kubeblocks.io/role=primary -n demo
>
NAME                READY   STATUS    RESTARTS   AGE
mycluster-redis-0   3/3     Running   0          24m

kubectl get pods -l kubeblocks.io/role=secondary -n demo
>
NAME                READY   STATUS    RESTARTS      AGE
mycluster-redis-1   3/3     Running   1 (24m ago)   24m
Currently, mycluster-redis-0 is the primary pod and mycluster-redis-1 is the secondary pod.
To fetch a more complete output, you can modify the -o parameter.
kubectl get pods -o custom-columns=NAME:.metadata.name,ROLE_LABEL:.metadata.labels."kubeblocks\.io/role"
Simulate a primary pod exception.
# Enter the primary pod
kubectl exec -ti -n demo mycluster-redis-0 -- bash

# Execute the debug sleep command to simulate a primary pod exception
root@mycluster-redis-0:/# redis-cli debug sleep 30
Open the Redis Sentinel log to view the failover.
kubectl logs mycluster-redis-sentinel-0 -n demo
In the logs, we can view when a high-availability switch occurs.
1:X 18 Apr 2023 06:13:17.072 # +switch-master mycluster-redis-sentinel mycluster-redis-0.mycluster-redis-headless.default.svc 6379 mycluster-redis-1.mycluster-redis-headless.default.svc 6379
1:X 18 Apr 2023 06:13:17.074 * +slave slave mycluster-redis-0.mycluster-redis-headless.default.svc:6379 mycluster-redis-0.mycluster-redis-headless.default.svc 6379 @ mycluster-redis-sentinel mycluster-redis-1.mycluster-redis-headless.default.svc 6379
1:X 18 Apr 2023 06:13:17.077 * Sentinel new configuration saved on disk
Connect to the Redis cluster to view the primary pod information after the exception simulation.
127.0.0.1:6379> info replication
Now mycluster-redis-1 has been assigned as the primary's pod.
Describe the cluster and check the instance role.
kubectl get pods -l kubeblocks.io/role=primary -n demo
kubectl get pods -l kubeblocks.io/role=secondary -n demo
After the failover, mycluster-redis-0 becomes the secondary pod and mycluster-redis-1 becomes the primary pod.
This section takes the cluster redis-cluster in the namespace default as an example.
View the initial status of the Redis cluster.
kbcli cluster describe redis-cluster
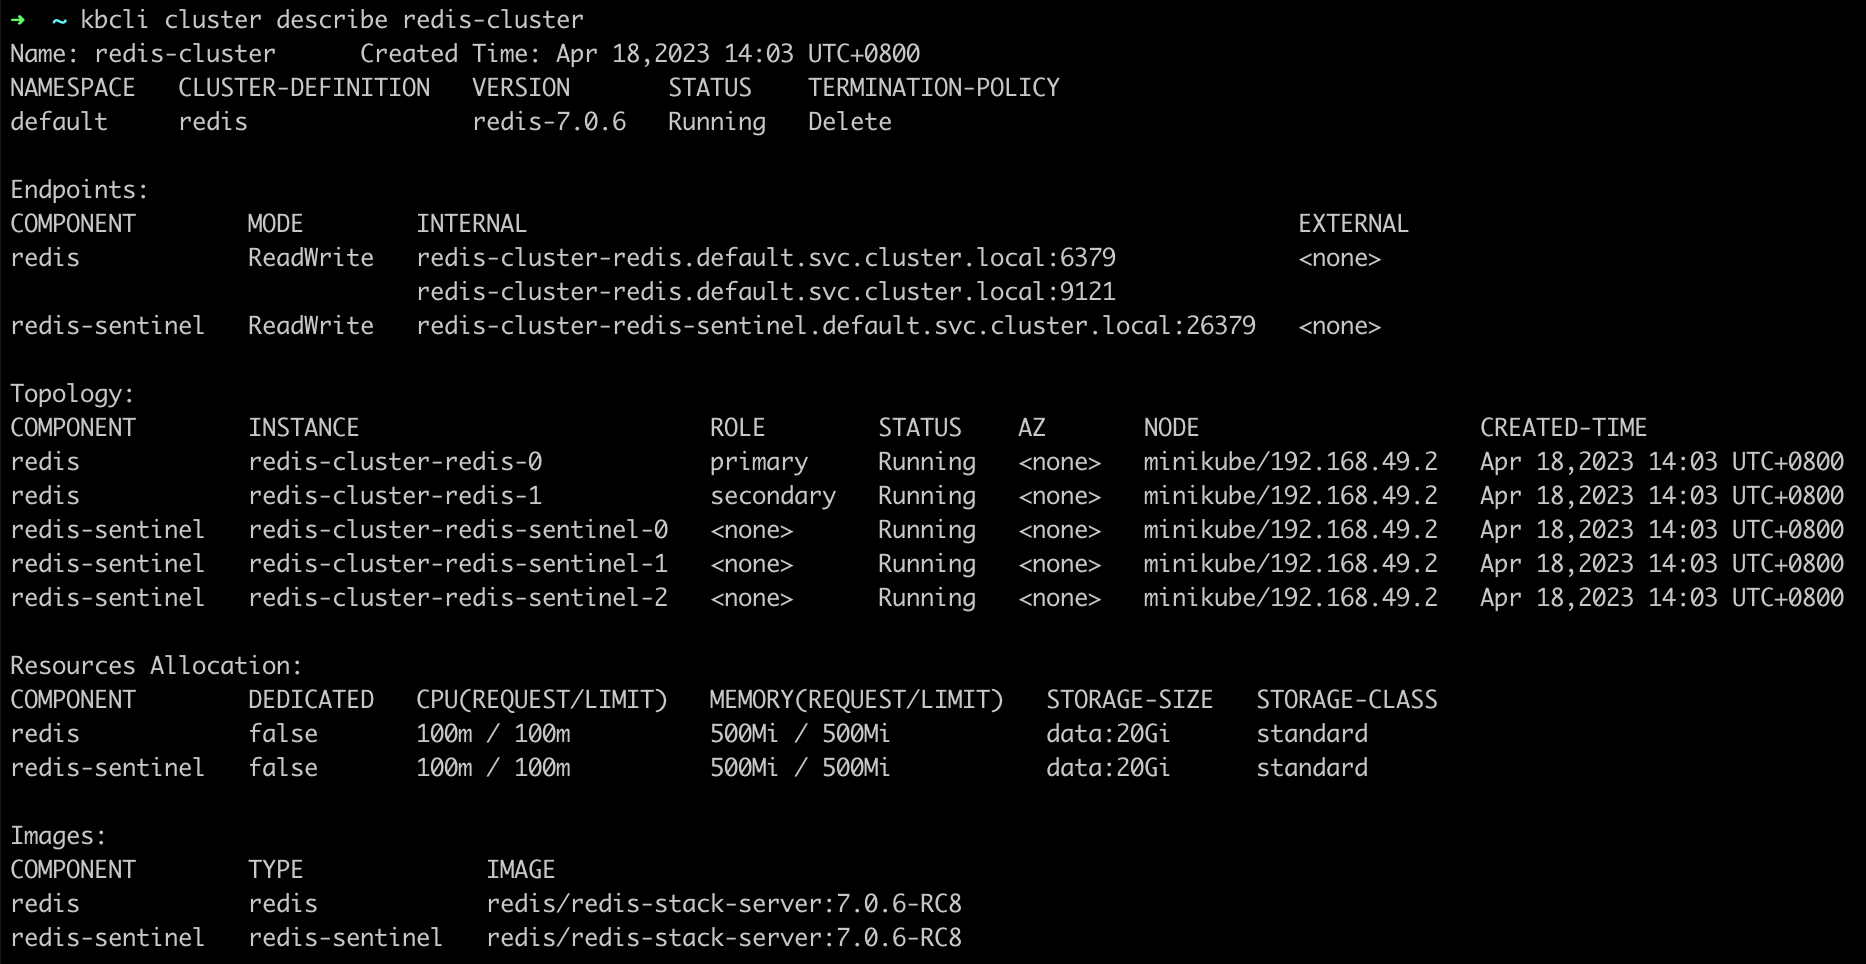
Currently, redis-cluster-redis-0 is the primary pod and redis-cluster-redis-1 is the secondary pod.
Simulate a primary pod exception.
# Enter the primary pod
kubectl exec -it redis-cluster-redis-0  -- bash

# Execute the debug sleep command to simulate a primary pod exception
root@redis-redis-0:/# redis-cli debug sleep 30
Open the Redis Sentinel log to view the failover.
kubectl logs redis-cluster-redis-sentinel-0
In the logs, we can view when a high-availability switch occurs.
1:X 18 Apr 2023 06:13:17.072 # +switch-master redis-cluster-redis-sentinel redis-cluster-redis-0.redis-cluster-redis-headless.default.svc 6379 redis-cluster-redis-1.redis-cluster-redis-headless.default.svc 6379
1:X 18 Apr 2023 06:13:17.074 * +slave slave redis-cluster-redis-0.redis-cluster-redis-headless.default.svc:6379 redis-cluster-redis-0.redis-cluster-redis-headless.default.svc 6379 @ redis-cluster-redis-sentinel redis-cluster-redis-1.redis-cluster-redis-headless.default.svc 6379
1:X 18 Apr 2023 06:13:17.077 * Sentinel new configuration saved on disk
Connect to the Redis cluster to view the primary pod information after the exception simulation.
kbcli cluster connect redis-cluster
# View the current primary pod
127.0.0.1:6379> info replication
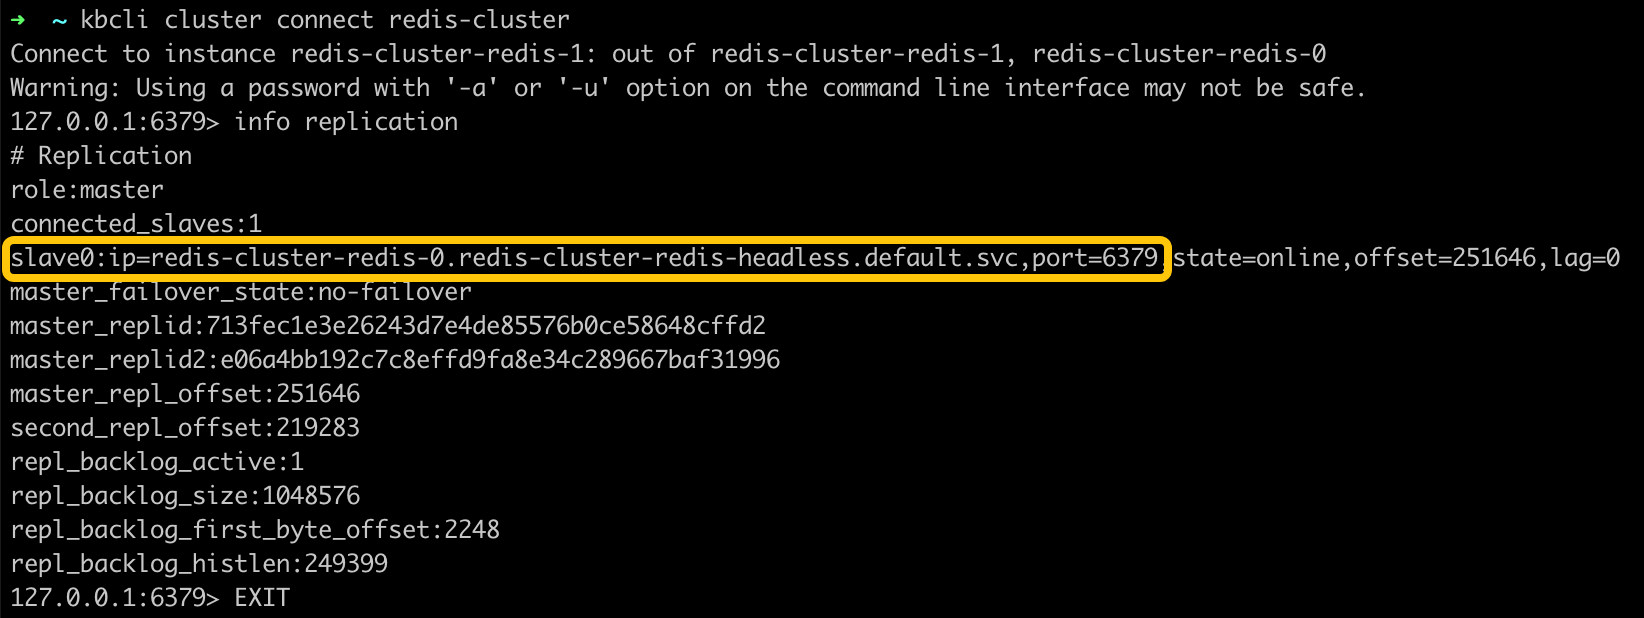
From the output, redis-cluster-redis-1 has been assigned as the primary's pod.
Describe the cluster and check the instance role.
kbcli cluster describe redis-cluster
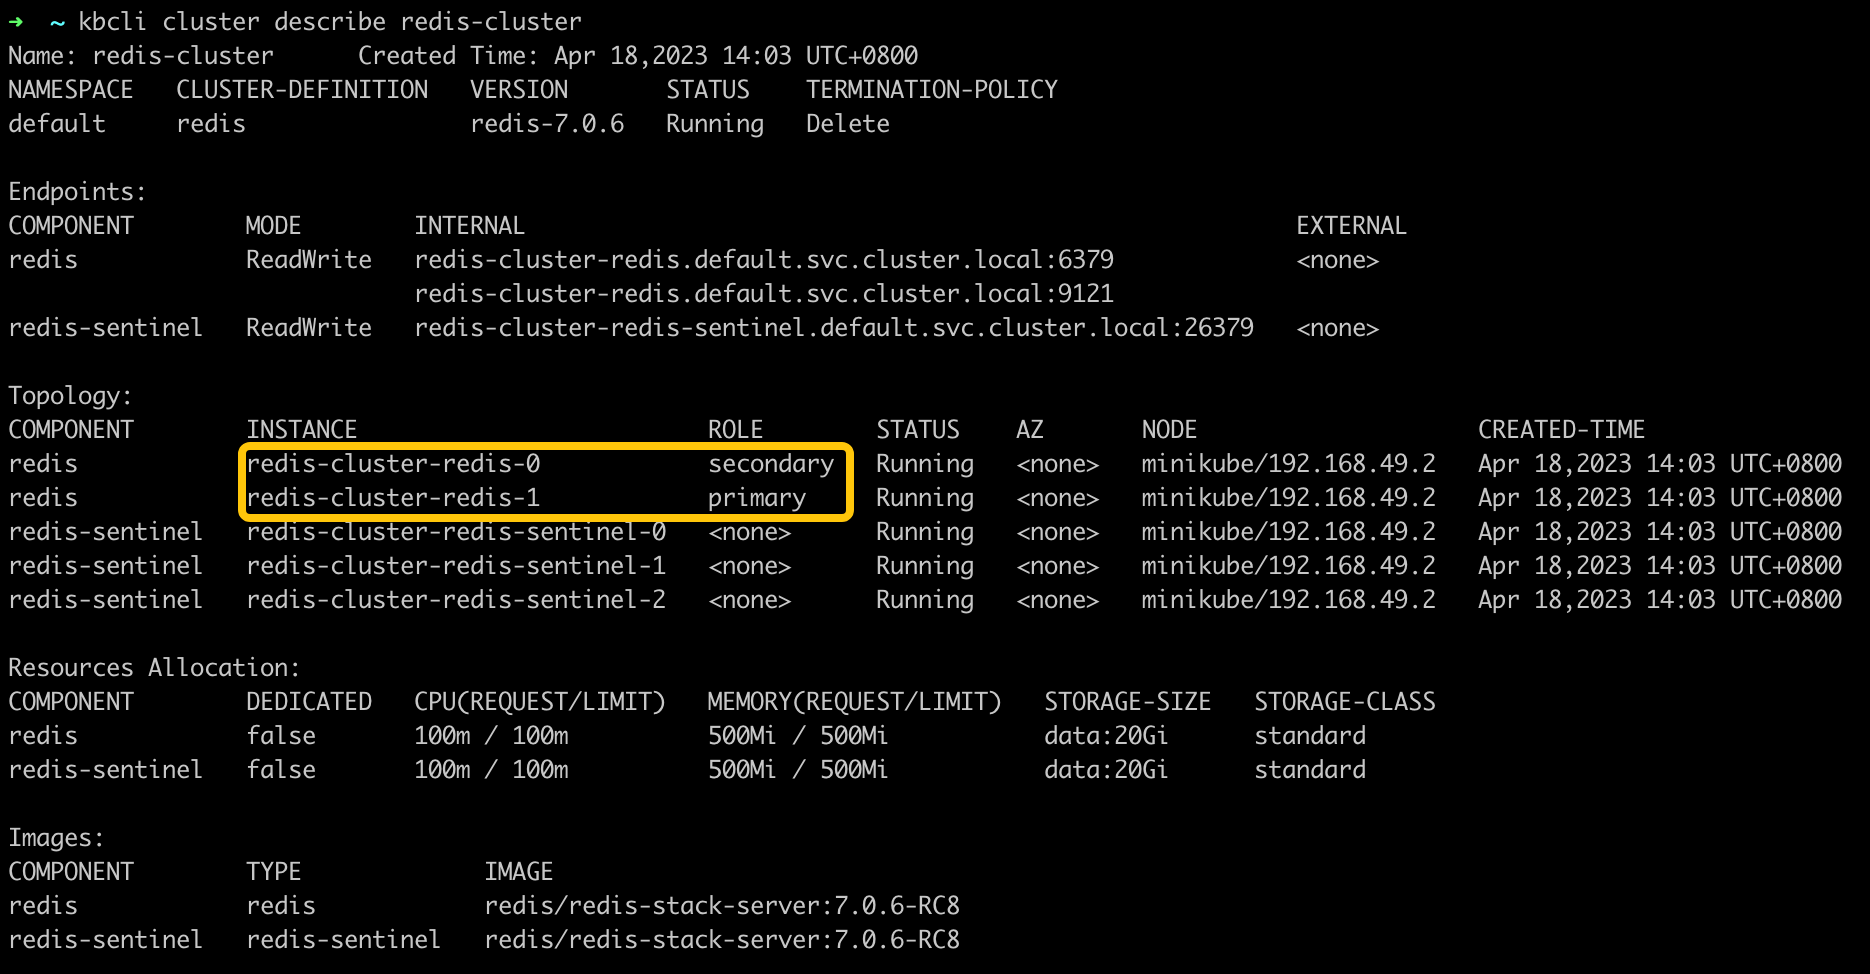
After the failover, redis-cluster-redis-0 becomes the secondary pod and redis-cluster-redis-1 becomes the primary pod.