WordPress is the world's most popular content management system (CMS). Since its release in 2003, it has become the go-to tool for building websites. Its extensive ecosystem of plugins and themes allows users to easily expand functionality and enhance the appearance of their sites. The vibrant WordPress community also provides abundant resources and support, further reducing the difficulty of development and maintenance.
As a result, WordPress has become the choice of millions of users worldwide, holding a dominant position in the field of website building.
KubeBlocks is an open-source Kubernetes operator that manages a variety of databases and stateful middleware. It supports over 30 database systems, including MySQL, PostgreSQL, Redis, MongoDB, Kafka, ClickHouse, and Elasticsearch. The core concept behind KubeBlocks is its use of a common set of abstract APIs (CRDs) to describe the shared attributes across these diverse database engines. This allows database vendors and developers to leverage addons to account for the differences between engines.
When deploying WordPress using the Bitnami image, the built-in MariaDB database provides an out-of-the-box solution. However, this approach has several drawbacks:
However, KubeBlocks can effectively address these shortcomings:
KubeBlocks includes a dedicated command-line tool called kbcli. If you haven't installed KubeBlocks yet, you can set up both kbcli and KubeBlocks with just a few simple commands. Before installation, make sure that your environment meets the requirements of KubeBlocks.
Install kbcli.
curl -fsSL https://kubeblocks.io/installer/install_cli.sh | bash
Install KubeBlocks.
kbcli kubeblocks install
Check whether KubeBlocks is installed successfully.
kbcli kubeblocks status
You can refer to the official documentation for detailed operations.
Before deploying WordPress, you need to create a database cluster to manage the backend data for WordPress. You can create this cluster using either kbcli or kubectl.
Create a HA cluster.
Here, we use the apecloud-mysql addon provided by KubeBlocks to create a MySQL cluster for WordPress. Using kbcli, you can quickly create a high-availability and production-ready MySQL database cluster with multiple replicas.
The example below sets the replicas to 3, which enables the RaftGroup mode and creates a MySQL cluster with three replicas.
# Enable addon (enabled by default)
kbcli addon install apecloud-mysql

# Create a cluster and you can set parameters, such as creating a cluster with three replicas by --set replicas=3
kbcli cluster create apecloud-mysql --cluster-definition=apecloud-mysql --set replicas=3
Check the cluster status and wait until all pods are running.
kubectl get pods

Get access address
You can access the MySQL cluster directly through Pods or services. In this example, we'll demonstrate accessing the cluster via services.
Run the following command to get the service address, which takes the form apecloud-mysql.default (namespace) .svc.cluster.local (default suffix).
kubectl get services

Configure the database cluster.
You can create users in the database for role management in WordPress. Here, we create a user named myadmin to serve as the primary user when installing WordPress.
Run the command below to connect to the MySQL database as the root user.
kbcli cluster connect apecloud-mysql
In the database, execute the following SQL to create a user and grant permissions. Set database permissions as needed.
CREATE USER 'myadmin'@'%' IDENTIFIED BY 'password';
GRANT ALL PRIVILEGES ON *.* TO 'myadmin'@'%';
FLUSH PRIVILEGES;
create database wordpress;
Run the following command to create mysql-secret and set the key mariadb-password=password. During the installation, WordPress will use this password key value as the database password. Note that the key name for the password must be mariadb-password. The username will not be read from this secret.
kubectl create secret generic mysql-secret --from-literal=mariadb-password=password
You can create a secret to be referenced later during the WordPress installation to avoid transmitting the password in plaintext.
Install WordPress.
Install WordPress and configure the parameters.
helm install my-release oci://registry-1.docker.io/bitnamicharts/wordpress \
--set mariadb.enabled=false \
--set externalDatabase.host=apecloud-mysql.default.svc.cluster.local \
--set externalDatabase.database=wordpress \
--set externalDatabase.port=3306 \
--set externalDatabase.user="myadmin"
--set externalDatabase.existingSecret="mysql-secret" \
--set replicaCount=2
Parameter description:
mariadb.enabled: Set this to false to disable the installation of MariaDB and use an external database service instead.host: Use the MySQL service address obtained earlier to access MySQL service, e.g. apecloud-mysql.default.svc.cluster.local.user, database, port: Set these parameters according to your actual needs.existingSecret: This is the recommended method for securely transmitting passwords. You can reference the previously created secret here to transmit passwords to avoid transmitting them in plaintext. Note that the secret must include the connection password. After existingSecret is set, the password field will be ignored.password: This is an optional parameter since existingSecret is recommended in this article to avoid plaintext transmission. Additionally, when existingSecret is set, the password field will be ignored.replicaCount: This represents the number of WordPress instance pods to start.Check the Pod status and make sure all Pods are ready and running.
kubectl get pods

Enter the WordPress container. You can view the database remotely and view the database information of WordPress.
kubectl exec -it wordpress-584444f68b-sxcss  -- bash
mysql -h  apecloud-mysql.default.svc.cluster.local  -u Wordpress
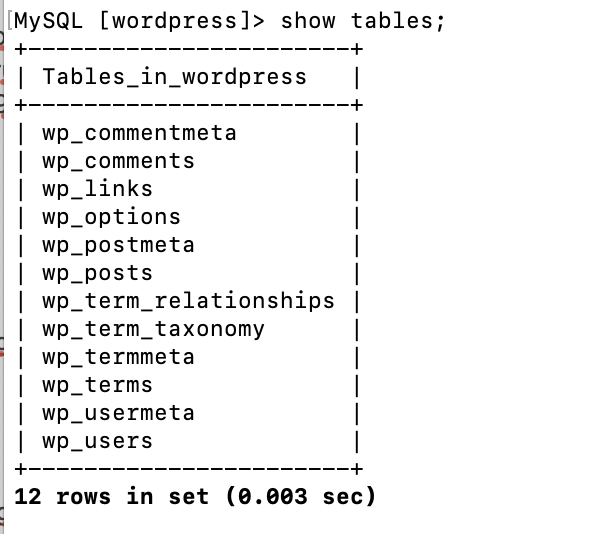
Now, WordPress and the database cluster are deployed successfully.
This blog will delete one Pod to simulate failover.
kubectl delete pod apecloud-mysql-0
After deleting the Pod apecloud-mysql-0, you can see that it has 3 out of 4 containers ready, with the MySQL container being unavailable.
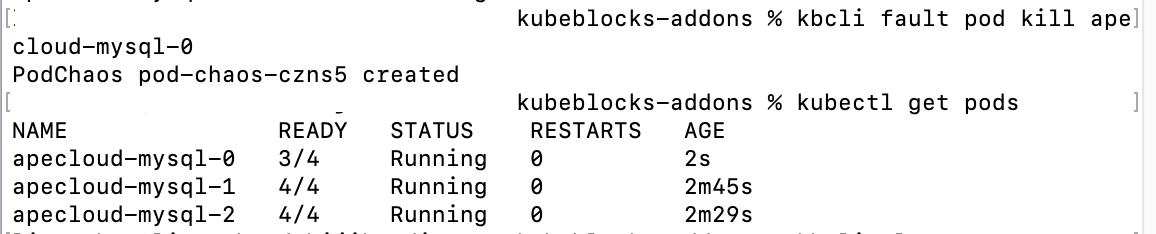
However, this does not affect the overall database connectivity.
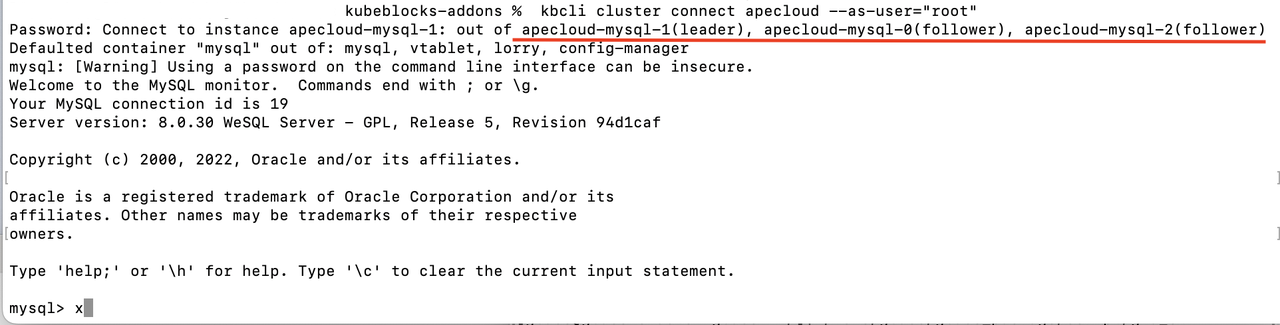
Additionally, you can observe that apecloud-mysql-1 become the leader Pod, demonstrating the powerful failover capabilities of KuebBlocks.
In cases of performance issues or similar problems, scaling up a database may be necessary. KubeBlocks provides a convenient scaling command using kbcli vscale, making it easy to increase compute resources.
kbcli cluster vscale mycluster --components=apecloud-mysql --cpu=500m --memory=500Mi
For more database parameter settings, please refer to the official documentation.